CentOS LNMP环境下v2ray的安装配置方法
前言:
是否能在同一台VPS服务器上同时运行lnmp和v2ray服务,一方面提供web服务功能,另一方面提供FQ功能,可是无论是百度还是google,貌似都没有实用的、针对新手的、在lnmp下安装配置v2ray的教程,于是本人决定做个安装测试,最终测试成功,与各位分享,有这种需求的可以参考一下!
测试环境:CentOS7_X86_64
[root@69 ~]# uname -a
Linux 69.194.11.14.16clouds.com 4.11.8-1.el7.elrepo.x86_64 #1 SMP Thu Jun 29 10:01:10 EDT 2017 x86_64 x86_64 x86_64 GNU/Linux
本机环境:已安装LNMP(1.9版本) lnmp的安装步骤(略)
[root@69 ~]# lnmp status
+-------------------------------------------+
| Manager for LNMP, Written by Licess |
+-------------------------------------------+
| https://lnmp.org |
+-------------------------------------------+
nginx (pid 1439 1438 1433) is running...
php-fpm is runing!
SUCCESS! MySQL running (2367)
下面我们正式开始安装配置:
1.建立一个vhost(虚拟站点),注意,这个站点是真实存在的。
[root@69 ~]# lnmp vhost add
+-------------------------------------------+
| Manager for LNMP, Written by Licess |
+-------------------------------------------+
| https://lnmp.org |
+-------------------------------------------+
Please enter domain(example: www.lnmp.org): demo.facekun.com
按申请的域名填写,并选择申请SSL。
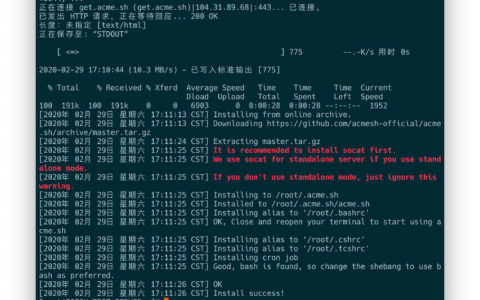
2.安装v2ray https://github.com/v2fly/fhs-install-v2ray
安裝和更新 V2Ray
// 安裝執行檔和 .dat 資料檔
# bash <(curl -L https://raw.githubusercontent.com/v2fly/fhs-install-v2ray/master/install-release.sh)
安裝最新發行的 geoip.dat 和 geosite.dat
// 只更新 .dat 資料檔
# bash <(curl -L https://raw.githubusercontent.com/v2fly/fhs-install-v2ray/master/install-dat-release.sh)
移除 V2Ray
# bash <(curl -L https://raw.githubusercontent.com/v2fly/fhs-install-v2ray/master/install-release.sh) --remove
info: Extract the V2Ray package to /tmp/tmp.1IxgQAO6U9 and prepare it for installation.
info: Systemd service files have been installed successfully!
warning: The following are the actual parameters for the v2ray service startup.
warning: Please make sure the configuration file path is correctly set.
~~~~~~~~~~~~~~~~
[Unit]
Description=V2Ray Service
Documentation=https://www.v2fly.org/
After=network.target nss-lookup.target

[Service]
User=nobody
CapabilityBoundingSet=CAP_NET_ADMIN CAP_NET_BIND_SERVICE
AmbientCapabilities=CAP_NET_ADMIN CAP_NET_BIND_SERVICE
NoNewPrivileges=true
ExecStart=/usr/local/bin/v2ray -config /usr/local/etc/v2ray/config.json
Restart=on-failure
RestartPreventExitStatus=23

[Install]
WantedBy=multi-user.target
# In case you have a good reason to do so, duplicate this file in the same directory and make your customizes there.
# Or all changes you made will be lost!  # Refer: https://www.freedesktop.org/software/systemd/man/systemd.unit.html
[Service]
ExecStart=
ExecStart=/usr/local/bin/v2ray -config /usr/local/etc/v2ray/config.json
~~~~~~~~~~~~~~~~
warning: The systemd version on the current operating system is too low.
warning: Please consider to upgrade the systemd or the operating system.

installed: /usr/local/bin/v2ray
installed: /usr/local/bin/v2ctl
installed: /usr/local/share/v2ray/geoip.dat
installed: /usr/local/share/v2ray/geosite.dat
installed: /usr/local/etc/v2ray/config.json
installed: /var/log/v2ray/
installed: /var/log/v2ray/access.log
installed: /var/log/v2ray/error.log
installed: /etc/systemd/system/v2ray.service
installed: /etc/systemd/system/v2ray@.service
removed: /tmp/tmp.1IxgQAO6U9
info: V2Ray v4.45.2 is installed.
You may need to execute a command to remove dependent software: yum remove curl unzip
Please execute the command: systemctl enable v2ray; systemctl start v2ray
注意:不要装那种集成多项功能的一键安装脚本。不要装那种一键安装脚本。不要装那种一键安装脚本。
此脚本会自动安装以下文件:
/usr/bin/v2ray/v2ray:V2Ray 程序
/etc/v2ray/confian>控制V2Ray的运行。
如果使用Linux并开启了systemd,可以使用journalctl -u v2ray查看V2Ray退出时的日志。
3.修改v2ray服务端配置文件/etc/v2ray/config.json
/usr/local/etc/v2ray/config.json
{
    "log": {
        "access": "/var/log/v2ray/access.log",
        "error": "/var/log/v2ray/error.log",
        "loglevel": "warning"
    },
    "inbounds": [{
            "port": 11055,
            "protocol": "vmess",
            "settings": {
                "clients": [{
                        "id": "27848739-7e62-4138-9fd3-098a63964b6b",
                        "level": 1,
                        "alterId": 0
                    }
                ]
            },
            "streamSettings": {
                "network": "ws",
                "wsSettings": {
                    "path": "/tech"
                }
            }
        }
    ],

    "outbounds": [{
            "protocol": "freedom"
        }
    ]
}如果使用Linux并开启了systemd,可以使用journalctl -u v2ray查看V2Ray退出时的日志
systemctl enable v2ray
systemctl start v2ray

a1cfd054-3037-400e-ad3f-095cf67a2987
其中以下五个信息是我们在后续v2客户端配置中需要用到的,请保存下来
- port
- protocol
- id
- level
- alter Id
4.修改Nginx配置文件
(安装完毕后往该域名目录内丢入一个WP),并开始配置nginx,注意,是修改对应该站点的站点配置文件。
在/usr/local/nginx/conf/vhost下找到与域名相同的文件夹,修改conf文件的配置。
[root@69 ~]# vi /usr/local/nginx/conf/vhost/demo.syshy.net.conf有必要的话假如301跳转,强制访问http的请求至https(这个我没有做,网上教程比较多,添加两段代码就可以)
重点需要写入v2ray的配置信息:
在server段加入以下内容

location /v2ray {
proxy_redirect off;
proxy_pass http://127.0.0.1:38187;
proxy_http_version 1.1;
proxy_set_header Upgrade $http_upgrade;
proxy_set_header Connection "upgrade";
proxy_set_header Host $http_host;
}
注意:38187是我的v2ray监听端口,一定要和v2ray配置文件中的端口对应
5.客户端配置

传输协议、加密方式等参数按图设置。
最后启动客户端,测试是否正常。
THE END
二维码